Proper soil preparation and planting depth are very important to the health and long life of your bulbs
The Soil and Site
Most bulbs need full sun and enriched, well drained soil. They should receive at least 4 hours of sunlight per day. If you plant in too much shade your bulbs will only produce foliage. Summer and autumn blooming bulbs often require full sun or part shade with a minimum of 6 hours sun. Be sure to check the needs of the variety you have selected.
Bulbs need good drainage, they do not like soggy soil. A raised bed or slope is ideal. Do not plant bulbs at the bottom of a slope or low points where water collects or your bulbs will rot.
If your soil is clay or heavy and wet, it is very important that you amend the soil before planting bulbs. Your bulbs will likely rot if you plant in soil that does not dry out or if you water heavily for the needs of other annuals and perennials in the bed. So first, select a planting site that will not be heavily watered through summer. Then you can correct the soil conditions by digging in amendments. Soil pH should be neutral to slightly acid, between 5.5 and 7.3.
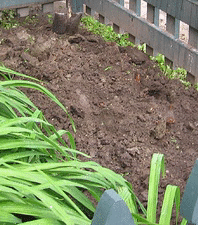
If the soil is wet and heavy, add compost or peat moss to the soil. (Although a sandy loam is best, NEVER add sand to clay or you will wind up with cement.) Compost will also improve a too-sandy soil. Mix the amendments into the soil digging to a depth of 12”, 18” is even better. See Soil Amendments for specific information on what, how much and how to add organic material to your soil. On the same page you can also find information on adjusting the pH of your soil.
Digging the Holes
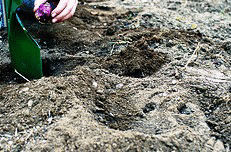
Spring flowering bulbs should be planted two to three times as deep as the bulb is long. Larger bulbs like tulips and daffodils need to be planted 3 times as deep as their height, or about 8” deep. Smaller bulbs only need to be 3 - 4” deep. Specific information should come with your bulbs. If you plant them an inch or two too deep, they will just take a bit longer to emerge from the soil. The bulb package will also recommend how far apart to plant the bulbs , but feel free to adjust the distance depending on the results you intend. Generally large bulbs should be less than six inches apart, and small bulbs should be less than three inches apart. Odd numbers and irregular lines or shapes are most pleasing.
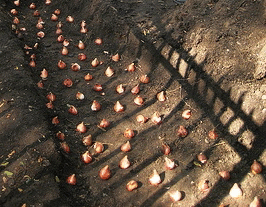
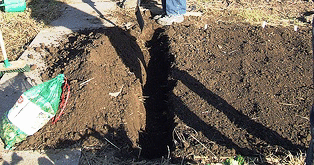
In the colder northern climates, zone 4 or colder, 3 - 4” of mulch will keep your soil temperature more constant and prevent rapid thaw/freeze cycles from heaving your bulbs out of the soil. In severely cold climates or in lighter soils high in sand, you may want to plant bulbs 1 - 2” deeper than recommended so a “false spring” doesn’t cause them to surface too early. If you are planting a large area, it is best to till the entire area to the proper planting depth so the bulbs can be simply press into the soil to the correct depth. You should not have to push hard into the soil. If you do, the soil is not cultivated loose enough and deep enough. This also creates a well drained bed which will contribute to your bulbs’ good health and long life. Similar results can be achieved by digging trenches. Dig deeper than necessary to allow good drainage under the bulbs, and replace enough soil to plant your bulbs at the correct depth. Then bulbs can be positioned in the bottom of the trench pointed side up and the soil replaced on top.
Your bulbs will not need fertilizer the first year, as everything they need is inside the bulb. But phosphorous can be added to the soil to encourage root development. Use bonemeal or superphosphate to mix into the soil well below the bulbs where the roots will be growing. This is easily done when you prepare an entire bed or dig a trench. If you must dig individual holes, do NOT just dump bonemeal or superphosphate into the hole as it will burn young roots. After you have removed soil to the proper planting depth for your bulb, dig deeper to mix the phosphorous into the soil. (Be aware though, that dogs are attracted to the bonemeal. I once had a dog dig up 100 bulbs the very day I finished planting!) Follow package directions carefully to add the right amount to your soil, more than recommended is definitely NOT better. A slow release granular fertilizer for bulbs applied to the surface of the soil is easiest. This should also be applied each fall thereafter.
If rodents are a problem in your area, you may want to protect your bulbs from the burrowing thieves while you are preparing the planting bed. Line the hole with small mesh chicken wire to prevent them from burrowing to the bulbs. Over the top of the bed, lay a large holed mesh to prevent squirrels from digging up the bulbs. The larger mesh is necessary to allow the foliage to emerge without interference. Certain bulbs are not preferred by deer or squirrels, but I have found that if they are hungry enough they will eat anything and everything. Try daffodils, anemones and hyacinths.
Preparing a bed or digging a trench for planting also gives you an opportunity to layer bulbs or incorporate other summer perennials without wondering “exactly where did I plant those ... whatevers... last year”. Dig your bed or trench deep enough for the largest bulbs and place those on the bottom. Bulbs should be placed pointed end up. Cover them with soil, filling to the proper depth for the next layer of bulbs. Cover those and finish with the smallest bulbs. Other perennials can be planted at the same time, surrounding them with bulbs. But be sure to allow plenty of room for the perennials to spread without interfering with the bulbs.
Water thoroughly, and keep the soil moist, supplementing rains with weekly watering until the bulbs have rooted. Once the soil has begun to freeze, cover the bed with 4 - 6 inches of mulch in zones 5 and north. Now, wait patiently until spring!
