Growing perennials in containers
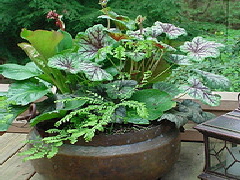
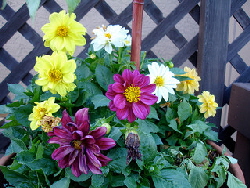
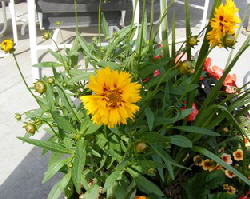
Use containers planted with perennials on the deck or patio, at the front walk and entry, or put them right out into the gardens and landscape. Container gardens can create a wonderful accent or focal point anywhere. Keep in mind that perennials planted in containers will likely require some special care to keep them alive over winter.
Using perennials in containers is a great way to save on the expense of purchasing annuals year after year, but there are other advantages too:
Using perennials, perhaps combined with annuals, gives you a much larger choice of plants. Especially for containers in shade, which is a limited selection for annuals.
Perennials growing in your gardens and landscape can be repeated in your container gardens to unify your colors and design.
Growing perennials in containers is the perfect way to have a perennial garden if you don’t have the space or time for an in the ground garden.
Perennials that are not hardy in your region can be grown in containers if you are willing and able to overwinter them properly.
Perennials that typically do not thrive in the soils of your region can be grown in ideal conditions in a container.
Invasive or fast spreading perennials are easily contained in a container.
Heat sensitive perennials potted in containers can easily moved into shade during periods of extended heat. Containers can also be moved with the sun or with the shade as the sun angles change through the season.
Containers can be easily moved, perhaps to the back of a container arrangement, when perennials are out of bloom.
Containers potted with perennials can be used right out in your gardens to add unique interest or to showcase a special perennial.
Weeding is virtually eliminated.
Deadheading is easier on the back when the plants sit higher in a container than ground level.
With proper plant selection you can have beautiful blooms before the last frost when annuals can be planted.
Getting Started
The most important thing to decide first is where your container be placed. How much sun, early morning or late day, will be very important to know for plant selection. And will the plants be exposed to wind? Will the container be in a spot convenient for watering thirsty plants? If not, you may want to be considering drought tolerant plants. But more on plant selection later.
Let’s get back to the containers. You can use just about anything for a container if it will hold soil. But you also need good drainage, and there are several other considerations.
Choosing a Container
Plastic containers are durable, lightweight and holds moisture in the soil, but may not have the natural look many gardeners prefer. New resin and plastic materials are very lightweight and can give the appearance of pottery. Use a lighter colored container, the dark color plastics can heat up the roots and dry out the soil more quickly.
Clay and pottery containers can be a bit heavy but have a natural look, good drainage, and keep the roots cooler in hot weather. Clay pots can dry out quickly, if it is glazed or painted it will hold moisture better. Clay and pottery can crack it left outside in cold regions.
Concrete containers are a natural for container gardens. They have a natural look, keep your soil cool, allow drainage but also hold moisture well. They are, however, extremely heavy. Be sure to place it well the first time so you don’t have to move it. Concrete will also hold moisture going into winter and freezing and thawing can create cracks. If you must store it outside, cover it with heavy plastic sheeting after a good dry spell to keep water out going into winter.
Wood containers, like old whiskey barrels or wooden crates, add an interesting and natural look to your garden, deck or patio. Many wooden containers that you might consider will need to be lined with a landscape fabric or similar material so it will hold soil. Sealing or conditioning the wood will help maintain the beauty of the wood, but be careful about the inside of the container. Some sealers can contain chemicals that may be toxic to roots. If the wood is old and dry you may want to consider priming and painting it to prevent further deterioration.
Iron basket and trough containers have also become widely available. These are durable and interesting, but will need a coco liner to hold the soil. Remember that the liners will deteriorate and need to be replaced every few years. These types of containers provide excellent drainage and will usually need frequent watering.
Metal containers such as large watering cans or big metal milk jugs can be used to add simple or country charm. Don’t forget to drill drainage holes. If the container is flat bottomed with no recess you should also set it up on small blocks or a container trolly so water can flow out the holes. Metal containers can get pretty hot, so they might be best used where they are shaded at least through the hottest part of the afternoon.
I don’t think there is any such thing as a container that is too large. Small pots are nice for annuals that bloom all summer, but with perennials you will want a mix of plants that bloom at different times and perhaps some annuals or foliage plants. That means you will need plenty of room for roots. And a larger pot means more soil to help protect your perennials’ roots over winter in cold climates.
Drainage
Drainage holes in your container are critical to prevent the soil from remaining waterlogged and causing root rot. If your chosen container does not already have drainage holes, drill holes in yourself. There are drill bits made specifically for a variety of materials including metals and concrete. Just ask for guidance at your hardware store for your specific material.
Rocks, stones, pebbles or styrofoam peanuts are often used at the bottom of containers. I personally see no use for it. If water can drain from you container you don’t need a bottom layer for water to “sit”. And it won’t take long for those spaces to fill up with soil anyway. That space is much better used for soil that the plants will need.
To prevent or minimize soil from draining out with the water, cover drainage holes with a piece of screen or mesh such as hardware cloth. I just cut a piece to fit into the entire bottom of each container.
Soil
Always, always, always use potting soil. I cannot stress this enough. It is specifically blended to hold just the right amount of moisture. Garden soil is very heavy and does not drain well enough for containers. It will become wet, compacted and lose air pockets essential for plant roots. Potting soil should be lightweight and fluffy for aeration.
Soil in containers can be rapidly depleted of nutrients, which get flushed out of the soil with water. Normally container soil is replaced every year or two, but when using perennials they may stay put for a while. You will, of course, need to fertilize most perennials a bit more than when they are planted in the ground. But as much as you are able, the soil should be if not replaced, at least refreshed. There is typically some soil loss each year through drainage holes, by overflow in heavy rains, or when removing spent annuals. So each spring you can add some fresh potting mix and top dress with a little well rotted compost. Completely replace your soil by repotting your perennials at least every few years. Your plants will tell you when it’s time, their health and blooming will diminish.
Choosing Plants
Before you run out and buy perennials, take some time to plan your plants and composition. There are a number of things to think about before your select plants.
First and foremost, remember that perennials in a container are exposed to much harsher conditions over winter than perennials in the ground. Unless you have a plan for overwintering the container it is critical that you select plants AT LEAST 2 zones hardier than your region if you expect them to survive.
Use plants with similar needs for sun, water and feeding. You cannot give just one plant the extra sun water and fertilizer it needs without overwhelming and likely killing a plant that wants some shade or little food and water.
Think about the effect you want to create for the site and to complement your container. Would you prefer one luscious mounding foliage plant? A bouquet of different bloom types and colors? What color foliage and flowers would you prefer? Varying heights? Many gardeners go for a combination of thriller, fillers and spillers.
Most perennials will not grow to their full potential size in a container. To do so they prefer more space for roots as welll as space to spread their branches.
Would you like to add annuals for constant blooming? Or foliage plants as fillers to unify your composition?
Be sure to see Best Perennials for Containers to help you select your plants.
Planting Perennials in Containers
Planting perennials in a container is not any different than planting annuals. But typically you may have more variety in a perennial container garden so just a little planning will help to position plants in a pleasing arrangement.
Make sure the container is clean, you can disinfect containers with a mild bleach solution.
Start filling the container with potting soil, keeping in mind the depth of the potted perennials. Water the soil lightly as you fill.
When the container is more than half full of potting soil, check the depth of your potted perennials by placing the deepest one on top of the soil. Continue adding soil until the soil level of the potted perennials are at the desired level. The top of the original soil level should be an inch or so below the top edge of your container.
Place perennials, still in their nursery pots, on top of the soil. Work with the arrangement until you are satisfied with the placements. Typically you will want a tall “thriller” plant in the center as a focal point. “Fillers” should be arranged around the focal plant. “Spillers” are usually trailing plants that will spill over the edges of your container.
Remove the plants from their nursery containers and tease apart roots if the pot is rootbound. Place each plant back into the arrangement you decided on and start filling in between each plant. Gently press soil between and around the plants. Water thoroughly with a gentle spray and add more soil as necessary.
To help retain moisture until the plants fill out, cover the exposed soil with sphagnum peat moss. Soak the moss in a bucket of water to make it more workable.
Caring for your Perennial Containers
Take note of the recommended care for your chosen perennials, but there will be some slight differences when caring for perennials in containers. If you have combined perennials with similar requirements and chosen an appropriate site for your container maintenance should be minimal.
Container plants will generally need to be watered more frequently than recommended. The soil in a container will dry out more quickly than a garden in the ground. The container you have selected as well as weather conditions may also affect how much you need to water. Just after planting water every two to five days depending on the weather. As your plants get larger they will require water as much as daily during hot and dry periods.
City water from your garden hose contains salt, which can build up quickly in containers. If possible, use water from a rain barrel.
Water containers slowly with a gentle spray with the watering wand close to the soil. Holding the water over the container will cause most of the water to run off the foliage and on the ground. A heavy stream of water gushing into the soil will wash soil out of the container. And water runs through a container and right out the drainage holes if applied to quickly. You need to give the water time to thoroughly soak all the soil.
Water containers in the morning so the plants have moisture available through the heat of the day.
The soil nutrients in containers depletes much more quickly than garden soils, so you may need to apply fertilizer a bit more frequently than recommended for your general plant care. But never apply fertilizer heavily in a container since it cannot disburse into surrounding soil. Over fertilizing can damage the plant roots. Apply light solutions of fertilizer more frequently instead, but every few weeks is generally plenty for perennials. Or use a slow release 10-10-10 granular fertilizer sprinkled on the container soil surface in the spring.
Deadhead spent blooms to encourage new blooms to develop.
Pinch or prune back branches to shape or control size.
Completely replace all potting soil every one to three years depending on how vigorously your plants are growing and blooming. Divide any plants that have grown large when repotting. Dividing larger perennials will result in more vigorous growth and blooming.


